
For enthusiasts eager to explore the boundless possibilities of compact computing, the Raspberry Pi Pico W stands as a remarkable gateway into the world of microcontroller projects. This diminutive yet powerful device, part of the celebrated Raspberry Pi family developed in the UK to champion computer science education in schools and developing countries, offers an accessible platform for creating innovative solutions. By harnessing the capabilities of MicroPython and the intuitive Thonny IDE, anyone can transform this small computer into a sophisticated remote surveillance system complete with GPIO control and a web interface. This project not only demonstrates the versatility of the Pico W but also bridges the gap between Arduino-style programming and the robust ecosystem of Raspberry Pi, making it an ideal endeavour for both beginners and seasoned makers alike.
Setting Up Your Raspberry Pi Pico W Development Environment with MicroPython and Thonny
Embarking on this project requires establishing a solid foundation through proper configuration of your development environment. The Raspberry Pi Pico W, despite its modest size, supports over forty operating systems and programming frameworks, though MicroPython emerges as the most suitable choice for this particular application. This lightweight implementation of Python is specifically designed for microcontrollers, offering the perfect balance between ease of use and functionality. The journey begins with selecting the right tools and firmware, ensuring that your Pico W is ready to execute the sophisticated tasks required for remote surveillance and web server operations.
Installing MicroPython Firmware and Configuring Thonny IDE for Pico W Projects
The initial step involves downloading the MicroPython firmware tailored specifically for the Raspberry Pi Pico W. This firmware acts as the operating system for your microcontroller, enabling it to interpret and execute Python code efficiently. Tools such as balenaEtcher and the official Raspberry Pi Imager simplify the process of flashing firmware onto the device, though for the Pico W, a more straightforward method exists. By holding down the BOOTSEL button whilst connecting the device to your computer via USB, the Pico W appears as a mass storage device. Simply drag the downloaded MicroPython UF2 file onto this drive, and the firmware installation completes automatically within seconds. Once installed, the Thonny IDE becomes your primary workspace for writing and debugging code. This user-friendly editor provides seamless integration with MicroPython, offering features such as syntax highlighting, code completion, and direct communication with the Pico W through its interpreter window. Configuring Thonny requires navigating to the interpreter settings and selecting the MicroPython option specifically for the Raspberry Pi Pico, ensuring that all subsequent code executes directly on the microcontroller rather than on your host computer. This configuration establishes the essential link between your development environment and the physical hardware.
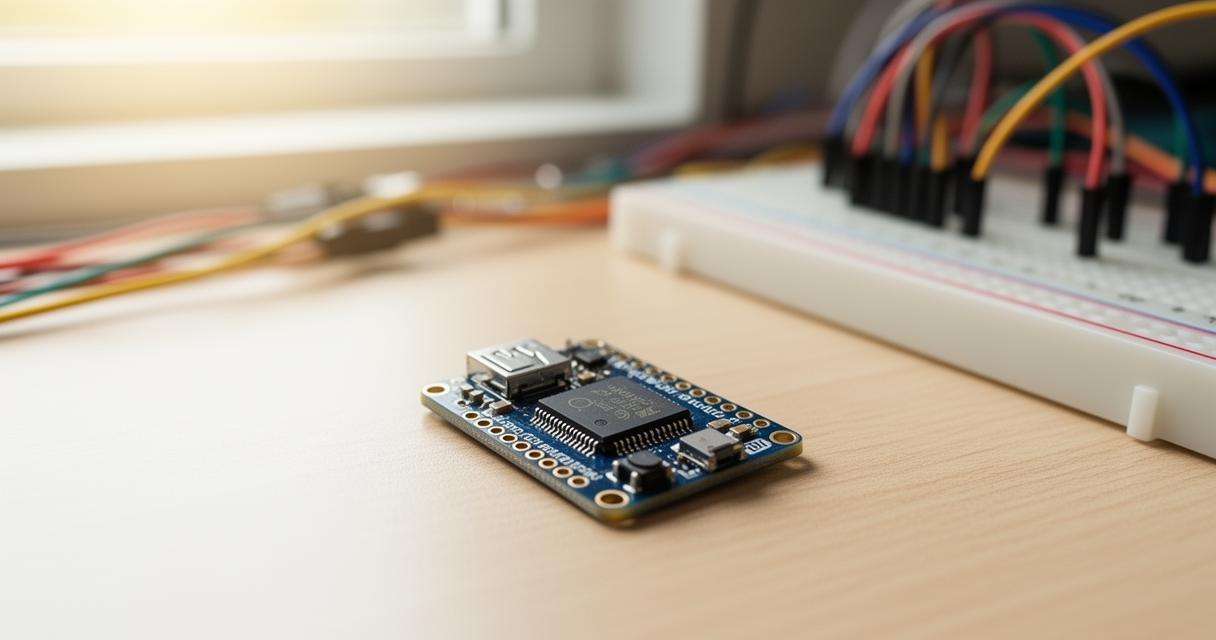
Establishing usb connections and verifying gpio pin functionality
With the firmware and IDE properly configured, attention turns to verifying the physical connections and testing the GPIO pins that will form the backbone of your surveillance system. The USB connection serves dual purposes in this setup: it provides both power to the Pico W and establishes the serial communication channel through which Thonny sends commands and receives data. To confirm that everything functions correctly, writing a simple test script proves invaluable. A classic approach involves programming one of the GPIO pins to blink an LED at regular intervals, demonstrating that the microcontroller responds to commands and can manipulate its physical outputs. The Pico W boasts numerous GPIO pins, each capable of digital input or output, alongside specialised functions such as pulse width modulation, analogue reading, and communication protocols including SPI and I2C. Understanding the pinout diagram becomes crucial at this stage, as it maps the physical pins to their corresponding GPIO numbers in your code. Testing each pin you intend to use for sensors, cameras, or control signals ensures no surprises emerge later in development. Documentation available through community resources, including forums and educational books, provides comprehensive guides for troubleshooting connection issues and understanding the electrical characteristics of each pin. This verification phase lays the groundwork for the more complex programming tasks ahead.
Building the Arduino-Compatible Surveillance System: GPIO Control and Sensor Integration
Transitioning from setup to implementation, the next phase focuses on creating the core surveillance functionality through strategic use of GPIO pins and sensor integration. The beauty of this project lies in its Arduino-compatible approach, which means structuring your code in a familiar setup-loop paradigm whilst leveraging the superior connectivity features of the Pico W. This hybrid methodology appeals to those with Arduino experience who wish to explore the enhanced capabilities offered by Raspberry Pi products. The surveillance system requires coordinating multiple inputs and outputs simultaneously, from camera triggers to temperature sensors, all whilst maintaining responsive web server operations. Achieving this balance demands careful consideration of timing, resource allocation, and efficient programming practices.
Programming GPIO Pins for Camera Module Control and Temperature Monitoring
Central to any surveillance system is the ability to capture and monitor environmental conditions reliably. Although the Pico W lacks native camera support comparable to full-sized Raspberry Pi boards such as the Raspberry Pi 5 released in October 2023, creative solutions involving external camera modules controlled via GPIO pins deliver impressive results. By configuring specific GPIO pins as digital outputs, you can trigger camera shutters or control recording states through relay modules or transistor circuits. The programming involves initialising these pins in your setup function, then creating routines that activate the camera based on motion detection signals or timed intervals. Simultaneously, temperature monitoring adds another dimension to your surveillance capabilities. Sensors compatible with the Pico W, such as DHT22 or DS18B20 devices, connect to GPIO pins and communicate through specific protocols. Reading temperature data requires implementing the appropriate library functions within MicroPython, parsing the sensor output, and storing values for display through the web interface. The code structure mirrors Arduino conventions, with initialisation occurring at startup followed by continuous monitoring loops that sample sensor data at defined intervals. This approach ensures compatibility for those familiar with Arduino projects whilst taking advantage of MicroPython's readability and built-in networking capabilities. Error handling becomes paramount when dealing with physical sensors, as connection issues or corrupted readings could disrupt the entire system. Implementing try-except blocks around sensor reading operations provides robustness, allowing the surveillance system to continue functioning even when individual components encounter temporary failures.
Creating arduino-style code architecture for seamless hardware integration
Structuring your project using Arduino-style architecture facilitates maintenance and future expansion whilst making the codebase accessible to a broader community of makers. This architectural approach divides the programme into distinct setup and loop functions, with the setup phase handling all initialisation tasks such as configuring GPIO pins, establishing network connections, and loading calibration data. The main loop then continuously executes, checking sensor states, updating web server endpoints, and responding to remote commands received through the interface. Within MicroPython, this structure translates naturally using function definitions and a while loop that runs indefinitely. The advantage of this organisation becomes apparent when integrating multiple hardware components, as each device can have its dedicated functions for reading, writing, and error handling. For instance, a camera control function might check a GPIO input for motion detection signals, whilst a separate temperature monitoring function polls the sensor and updates a global variable accessible to the web server. Shared resources such as network connections or display outputs require careful management to prevent conflicts, often achieved through simple flag variables or queuing mechanisms. The Arduino compatibility extends beyond mere code structure to include the use of familiar programming patterns such as polling versus interrupt-driven designs. Whilst interrupts offer superior responsiveness by triggering functions immediately when events occur, polling provides simplicity and predictability, making it ideal for learning projects. Community resources including documentation and forums offer countless examples of Arduino-to-MicroPython translations, helping developers adapt existing projects to the Pico W platform. This wealth of shared knowledge accelerates development and troubleshooting, embodying the collaborative spirit that has made Raspberry Pi a cornerstone of computer science education worldwide.
Developing a Web Interface Server for Remote Surveillance Access
Transforming your surveillance system from a standalone device into a remotely accessible solution requires implementing a web server directly on the Pico W. This capability represents one of the most significant advantages of the Pico W variant over its standard counterpart, as the integrated wireless connectivity enables it to host web pages and respond to HTTP requests without additional hardware. The web interface serves as the control centre for your entire system, displaying live sensor readings, camera status updates, and providing interactive controls for adjusting settings or triggering manual captures. Developing this interface demands understanding both server-side programming within MicroPython and client-side web technologies that render the user experience in a browser.
Setting Up a MicroPython Web Server on Your Pico W for Real-Time Monitoring
Creating a functional web server on the Pico W begins with establishing a stable wireless connection to your local network. The MicroPython network module provides straightforward functions for scanning available networks, connecting using credentials, and obtaining an IP address through DHCP. Once connected, the server implementation utilises socket programming to listen for incoming HTTP requests on a designated port, typically port eighty for standard web traffic. The server loop continuously accepts connections, parses incoming requests to determine which resource the client seeks, and responds with appropriate HTML content or data. For real-time monitoring capabilities, the web interface must dynamically update to reflect current sensor readings and system status without requiring manual page refreshes. Whilst sophisticated solutions might employ WebSocket connections for bidirectional communication, a simpler approach uses periodic AJAX requests from the client-side JavaScript to fetch updated data from specific endpoints on the Pico W. These endpoints return JSON-formatted data containing temperature readings, GPIO states, and timestamp information that the browser parses and displays in user-friendly formats. Designing the HTML interface requires balancing functionality with the limited processing power and memory available on a microcontroller. Keeping the page lightweight, minimising external dependencies, and using efficient CSS for styling ensures fast load times and responsive interaction. The server code itself must handle multiple request types, distinguishing between requests for the main page, data endpoints, and control commands that modify system behaviour. Robust error handling prevents the server from crashing when receiving malformed requests or encountering network issues, maintaining continuous operation essential for a surveillance system. Community resources including forums and YouTube channels dedicated to Raspberry Pi projects offer extensive tutorials on web server implementation, providing ready-made code templates that can be adapted for specific surveillance requirements.
Implementing temperature control features and remote gpio management through web programming
Elevating the web interface from passive monitoring to active control introduces interactivity that transforms the surveillance system into a comprehensive remote management platform. Temperature control features might include setting threshold values that trigger alerts when readings exceed specified limits, activating cooling systems through relay-controlled fans, or simply logging data for later analysis. Implementing these features requires creating additional server endpoints that accept POST requests containing control parameters sent from form submissions or button clicks on the web page. When the server receives such a request, it parses the included data, validates the inputs to prevent erroneous commands, and then adjusts the corresponding GPIO pins or internal variables accordingly. For example, a web form might allow users to set a maximum temperature threshold. Upon submission, the browser sends this value to the Pico W, which stores it in memory and continuously compares incoming sensor readings against this benchmark. When temperatures exceed the threshold, the system could activate a GPIO pin connected to an alarm or send notification data that the web interface displays prominently. Remote GPIO management extends this concept further, enabling direct control of any configured pin through the web interface. Toggle buttons or sliders on the webpage correspond to specific GPIO pins, allowing users to turn devices on or off, adjust PWM duty cycles for dimming lights or controlling motor speeds, or trigger camera captures remotely. The server-side code maps each control element to its physical pin, implementing safety checks to prevent conflicting commands or dangerous states. Security considerations become paramount when enabling remote control capabilities, as an exposed web server could potentially allow unauthorised access to your system. Implementing basic authentication, restricting access to local network addresses, or using HTTPS connections through reverse proxy setups adds layers of protection. Projects of this nature benefit immensely from the extensive community engagement surrounding Raspberry Pi, with social media presence on platforms such as Twitter facilitating knowledge exchange and troubleshooting assistance. Educational books dedicated to Raspberry Pi programming provide structured learning paths that cover both foundational concepts and advanced techniques applicable to projects ranging from smart home automation to sophisticated gaming systems, all utilising similar principles of web-based control and sensor integration.